Creating a secure certificate – internal resources
With chrome 68 just launched and some people nervous about the process behind creating a cert I thought it might be worth going through the steps of setting up a simple cert for the webpage of a FreeNAS server using an internal CA.
A while back I created an [internal CA using PFsense]
(https://www.gdwnet.com/2018/05/04/pfsense-internal-ca) and these steps will use that internal CA to generate the cert. There is no difference in this process than in creating a cert using a public provider. The internal CA works great for certs used ONLY by people inside a company and can be a good way to get familiar and confident with certs before paying out for one or obtaining a free one using Let’s Encrypt.
The easiest way for me to create a cert is by going to the cert manager on my internal CA and generating both the public and private key for a given URL.
There is no reason why the CA should not generate the private key as well as long as they do not retain the private key. If they keep a copy of the private key then there isn’t any security as they can intercept that traffic or potentially do even worse things to your site such as revoking the cert which is exactly what trustico did not so long ago.
In the case of my PFsense CA, it does retain the private keys but I am fine with that because it is purely internal and controlled by me and so there is no third party here who can intercept traffic or revoke certs.
In PFSense, to create the cert all I need to do is go to system -> certificates – scroll to the bottom then add/sign.
Once in there, if I select “Create an internal certificate” from the drop down list and fill out the form.
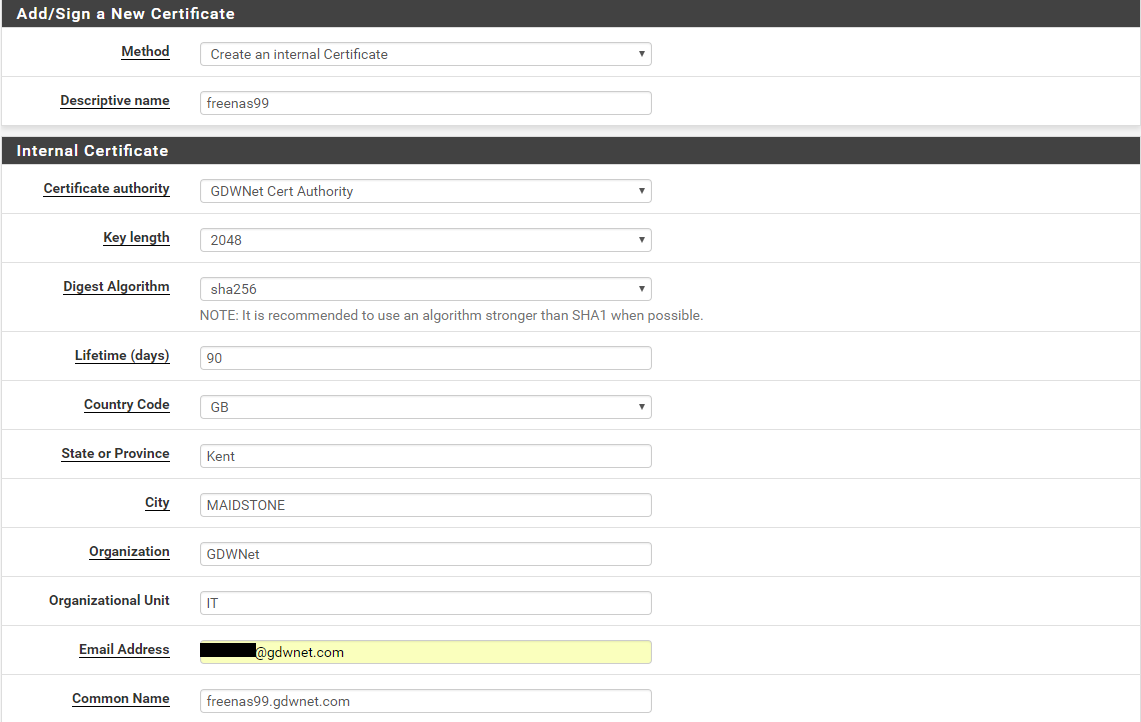
The list of options on the form need a little bit of explaining:
-
Identifier – this is just a label that identifies this cert. It has no bearing on the cert but for ease of use I always use the URL of the device I am creating the cert for as it makes it easier to identify in future.
-
Key Length and Digest Algorithm – These are the values for actually creating the secure elements of the cert. SHA256 (also sometimes called SHA-2) is the recommended one. Never use SHA-1 as that is considered too weak.
-
State, locality, organisation – these are label fields that don’t have much bearing on the cert but they will be visible if someone inspects the cert so ne careful what you use here
-
Email address: Email address of the person responsible – I use an email attached to the group IT dept. This address is used by many certificate companies to provide a notification when the cert is due to expire.
Common name – this has to be the URL you want to the cert to secure. If you make a typo here, you will need to regenerate the CSR so double check what you put into this box. -
Subject Alternative name – This is used by the cert to provide a list of potential alternative names that the cert could be known by. For example, my test server is called “freenas99.gdwnet.com” but if it was also accessed as “storage.gdwnet.com” then I’d put that name into the Subject Alternatuive name box. Think of this as a list of aliases for the cert.
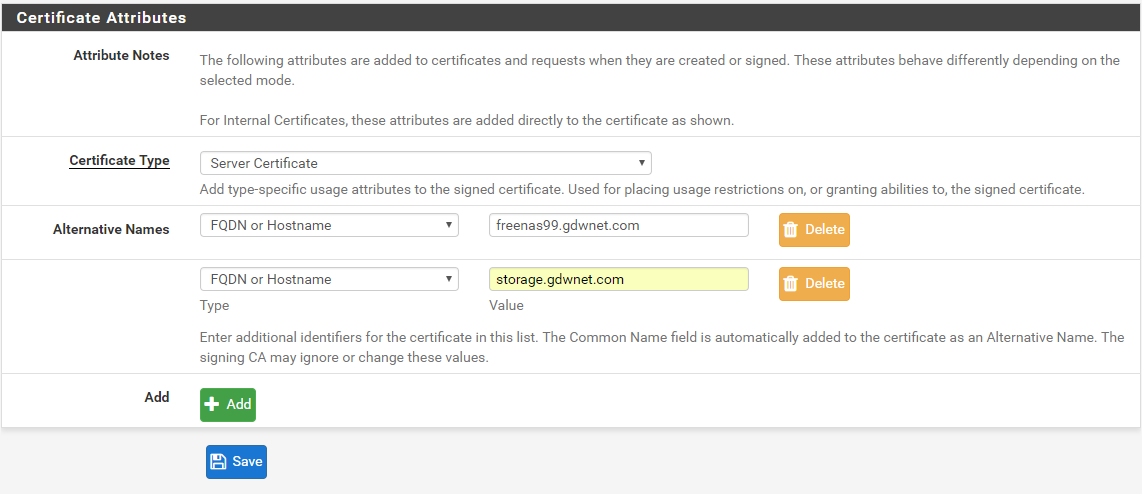
Once I hit save……

That is it. My certificate has been created and it can be installed on the server.
To install the cert I need to download two files. Those files are the cert itself and its corresponding private key. Certificates for installation should always come with those two parts. The cert is public and as such, is the part that the world interacts with while the key should always be private and installed on the server far away from anything even remotely publically accessible. If at any time you suspect that the private key has been compromised then the cert should be replaced.
In PFSense, I can download both parts of the key by clicking on the star icon for the cert and the key for the private key. The cert is called freenas99.crt and the key freenas99.key
Once I have the files it is a matter of launching the FreeNAS server GUI then click on System -> Certificates -> Import certificate
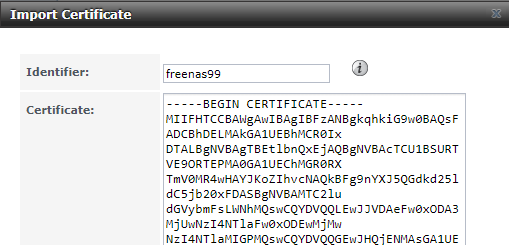
Because the CRT and key files are just text files it’s a simple matter of copying and pasting the contents of those files into the right places in the GUI.

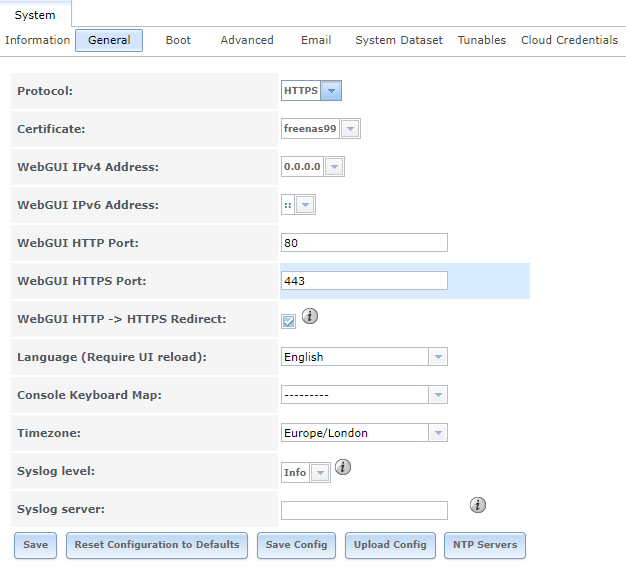
The final step is to tell FreeNAS to use HTTPS:
Now it is just a matter of connecting to the site and……..
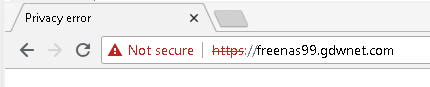
A problem! Why did this occur? Hitting F12 and the reason is clear:
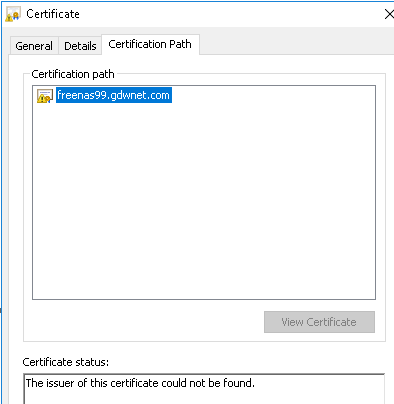
The root CA is missing. Certitficates work on a trust chain, the browser trusts a root certificate and, in turn, any certificate that is issued by that trusted provider is also trusted (unless it’s been revoked but that is a story for another time). In the case of a lab/corporate CA I can push out the root CA and add it to the trusted certificates store. Once that is done this cert will be trusted.
What I do not want to do is force external visitors to install my CA. In those cases I would go to Let’s encrypt to get a cert that already has a validated trust chain, this way, any visitors would trust my cert because their browsers trust the root CA that issued my cert.
Subscribe to Ramblings of a Sysadmin
Get the latest posts delivered right to your inbox